Most people Googling how to make a wedding cake fall into one of two groups: people who are seriously considering it, and people who’ve just realised how much a custom cake costs and are now seriously considering it. Either way, you’re here — so let’s get into it.
Making a wedding cake at home is genuinely doable. It’s not beginner-friendly in the sense that you can wing it on the morning of the wedding, but with the right plan and a clear three-day timeline, most people who can bake a decent layered cake can pull this off. The difference between a wedding cake and a regular birthday cake isn’t complexity — it’s structure, timing, and not rushing.
This guide covers everything from the recipe to the stacking to what actually goes wrong and why.
What Makes a Wedding Cake Different from a Regular Cake?
Before you start measuring flour, understand what you’re actually building. A wedding cake at home isn’t just a larger birthday cake. It needs to serve somewhere between 20 and 100 people, depending on the number of tiers. It needs to hold its own weight structurally — which means internal support, not just stacking tiers on top of each other. And it needs to look intentional, because it’s going to be photographed from every angle in every kind of light.
A wedding cake at home isn’t just a big birthday cake. It’s designed to:
- Serve 20 to 100+ people, depending on tiers
- Stay structurally stable under its own weight
- Look clean, minimal, and intentional
- Be built in stages—never rushed in one day
Most beginners start with a 2-tier setup. That’s exactly what professionals recommend, too.
Wedding Cake Recipe: What You'll Need
Keep the base simple. A reliable sponge recipe produces consistent results, and wedding cake making is not the time to experiment with a new technique. For the sponge, you’ll need cake flour or maida, sugar, room-temperature butter, eggs and extra egg whites, milk, baking powder, baking soda, and vanilla extract. Sour cream is optional but genuinely worth adding — it improves the texture and keeps the crumb moist for longer.
For the sponge:
- Cake flour or maida
- Sugar
- Butter (room temperature—non-negotiable)
- Eggs + extra egg whites for softness
- Milk
- Baking powder and baking soda
- Vanilla extract
- Sour cream (optional, but worth it for texture)
Pro tip: Room temperature ingredients blend evenly. Cold butter or eggs will mess up your batter texture before you’ve even started.
How to Make a Wedding Cake: The Full Step-by-Step
Step 1 – Bake Each Layer Separately
This is where most beginners go wrong—they try to bake everything together.
Don’t.
- Bake each tier in its own pan (6-inch for the top, 8 or 9-inch for the bottom)
- Line every pan with parchment paper
- Don’t overmix the batter once the flour goes in
- Expect your bottom tier to be slightly denser—it needs to carry weight
A denser bottom isn’t a mistake. It’s smart wedding cake step-by-step thinking.
Step 2 – Cool Completely and Level the Tops
Once out of the oven:
- Let cakes cool fully before touching them (seriously, don’t rush this)
- Use a long serrated knife to trim the dome off the top
- You want flat, even surfaces before you stack anything
Uneven layers = lopsided tiers. Flat layers = clean, professional finish.
Step 3 – Prepare Your Frosting and Filling
Classic choices for a wedding cake at home:
- Buttercream – stable, holds structure, great in Indian weather
- Whipped cream – lighter, but not ideal if your venue isn’t air-conditioned
For fillings between layers, you can use:
- Strawberry or raspberry jam
- Chocolate ganache
- Flavored cream or custard
Keep the flavors balanced. Wedding cakes should taste rich—not heavy.
Step 4 – Assemble Each Tier Before You Stack
Think of each tier as its own mini cake first.
For each tier:
- Place one layer on a cake board
- Brush with sugar syrup (this keeps it moist)
- Spread filling or frosting evenly
- Repeat with remaining layers
- Apply a thin crumb coat all over
- Chill for at least 30–45 minutes
The crumb coat is non-negotiable. It traps loose crumbs and creates a clean base for your final layer. Skip it, and you’ll have crumbs showing through your frosting.
Step 5 – Final Frosting and Finish
After chilling:
- Apply your final layer of frosting
- Use a bench scraper and turntable for smooth, sharp edges
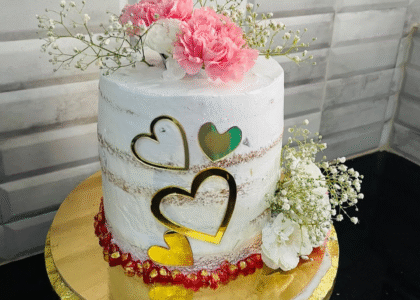
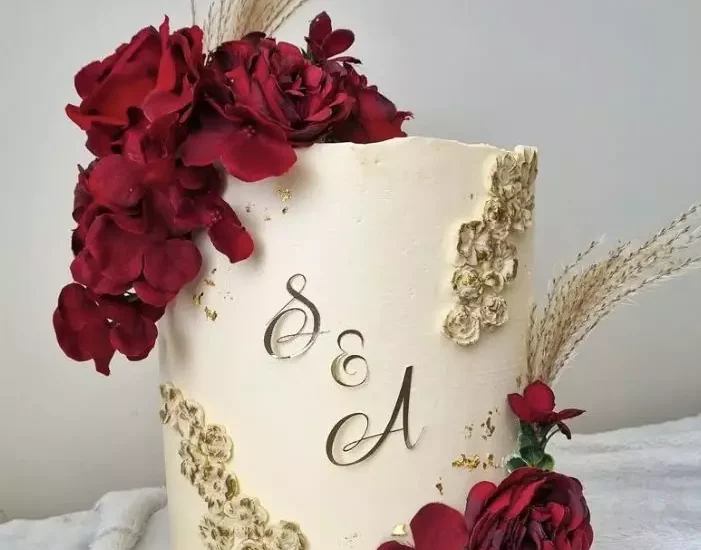
- Popular styles right now: plain white finish, semi-naked cake, minimal pressed flowers
Modern wedding cakes are moving away from heavy fondant and toward clean, minimal designs. Less is genuinely more here.
Step 6 – Stack the Tiers (Most Critical Step)
This is the step that makes or breaks a wedding cake.
Without internal support, your top tier will sink into the bottom. Here’s how to do it right:
- Insert 4–5 wooden dowels or thick bubble tea straws into the bottom tier
- Trim them flush with the top of the tier
- Place a thin cake board on top of the dowels
- Carefully lower the top tier onto it
- Use a long skewer through the center for extra stability if needed
No dowels = collapsed cake. It’s not a maybe. Do this every single time.
Step 7 – Plan Your Timeline (Non-Negotiable)
A wedding cake step by step doesn’t happen in one afternoon.
Here’s the ideal schedule:
- Day 1: Bake all cake layers, cool overnight
- Day 2: Assemble tiers, apply crumb coat, refrigerate
- Day 3: Final frosting, decoration, stacking
Even professional bakers follow this timeline. Rushing is how cakes crack, slide, or fall apart at the worst possible moment.
Mistakes That Ruin Wedding Cakes (and How to Avoid Them)
Don’t let small errors ruin days of work:
- Overmixing the batter after adding flour
- Frosting a warm cake (always wait)
- Skipping the crumb coat
- Not using dowels between tiers
- Trying to finish everything the same day
These aren’t beginner problems. Even experienced bakers make them when they’re in a hurry.
Can Beginners Actually Pull This Off?
Yes—with the right mindset.
✔ Start with a 2-tier design.
✔ Do a practice run at least a week before
✔ Keep your decoration simple
✔ Give yourself a proper 3-day timeline.
✔ Accept that imperfection is still beautiful
Plenty of home bakers make stunning wedding cakes at home simply because they planned properly and didn’t overcomplicate things.
Not Ready to DIY? There's Another Option.
Making a wedding cake at home is meaningful—but it also takes real time, energy, and focus during an already busy week.
If you want zero stress on your wedding day, a custom wedding cake from Ank Cake Land in Bangalore might be exactly what you need.
Every cake is:
- Freshly baked to order
- Designed exactly the way you want it
- Delivered on time, handled with care
- Built actually to hold up all day
A wedding cake at home isn’t about being perfect. It’s about being prepared.
Follow the steps, respect the timeline, keep the design manageable—and you’ll create something genuinely beautiful.
And if you’d rather hand it off to someone who does this every day, you know where to find us.
Visit us on Instagram: @Ankcakeland