Making a baby shower cake at home sounds intimidating — until you actually do it. Once you know the basics, it’s honestly one of the most satisfying things you can bake. No bakery-level skill required. Just a good recipe, a bit of patience, and some creativity.
This guide covers everything: the batter, the frosting, the design, and even what to write on the cake. Whether you want something simple or something that makes everyone stop and stare, you’ll find what you need here.
What You'll Need Before You Start
Get your ingredients and tools together before anything else. It saves a lot of mid-bake chaos.
For the Cake:
- 2½ cups all-purpose flour
- 2½ tsp baking powder
- ½ tsp salt
- ¾ cup unsalted butter (room temperature)
- 1¾ cups sugar
- 4 eggs
- 1 cup whole milk
- 2 tsp vanilla extract
For the Buttercream Frosting:
- 1½ cups unsalted butter (softened)
- 4–5 cups powdered sugar (sifted)
- 3–4 tbsp heavy cream
- 1 tsp vanilla extract
- Food coloring (optional)
Tools:
- Two 8-inch or 9-inch round cake pans
- Hand mixer or stand mixer
- Cooling rack
- Offset spatula
- Cake turntable (optional but very helpful)
- Piping bags and nozzles
- Bench scraper
Choosing Your Baby Shower Cake Design
Before you bake, decide on the look. This shapes everything — how many tiers, what colors, what decorating style.
Here are some of the most popular baby shower cake ideas that actually work for beginners:
- Simple buttercream baby shower cake — smooth or textured finish, minimal decoration. Clean, elegant, hard to mess up.
- No fondant baby shower cakes — great news: you don’t need fondant to make something beautiful. Fresh cream and buttercream designs look stunning and taste far better.
- Two-tier baby shower cake — adds drama without requiring professional skill. Stack two round cakes, frost each layer, done.
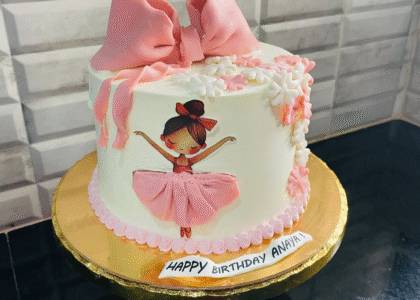
- Themed designs — elephant, teddy bear, floral, stars. Pick one theme and stick to it.
If you’re doing this for the first time, go simple. A well-frosted single-tier cake with clean piping beats a messy attempt at something complex every single time.
Step 1: Bake the Cake Layers
Preheat your oven to 175°C (350°F). Grease and flour both pans — or line them with parchment paper.
In one bowl, whisk together the flour, baking powder, and salt. Set it aside.
In your mixing bowl, beat the butter and sugar on medium-high for about 3–4 minutes. You want it pale and fluffy, not just combined. This step matters more than people realize — it’s what gives the cake its texture.
Add the eggs one at a time. Beat after each one. Then add vanilla.
Now alternate adding the dry ingredients and milk, starting and ending with the dry mix. Don’t overmix once the flour goes in — mix just until everything comes together.
Divide the batter evenly between your pans and bake for 28–32 minutes. A toothpick inserted in the center should come out clean.
Let the cakes cool in the pans for 10 minutes, then transfer to a wire rack. Do not frost them while warm. They need to be completely cool — at least an hour.
Step 2: Make the Buttercream
Beat the softened butter alone for 2 minutes until it’s creamy and light. Add the powdered sugar one cup at a time on low speed so you don’t end up wearing it.
Add the heavy cream and vanilla, then increase speed to medium-high and beat for 3–4 minutes. The frosting should be light, smooth, and spreadable. If it’s too stiff, add cream by the teaspoon. Too soft, add more powdered sugar.
Divide the buttercream into separate bowls if you’re using multiple colors. Add gel food coloring (not liquid — it changes the consistency) and mix until you get the shade you want.
For a baby shower fresh cream cake variation, you can use whipped cream instead of buttercream. It’s lighter and less sweet, but you’ll need to refrigerate the cake and serve it the same day.
Step 3: Level and Stack the Layers
Once the cakes are fully cooled, use a serrated knife to level the tops — just slice off the dome so both layers sit flat.
Place the first layer on your cake board or plate. Add a generous amount of frosting and spread it evenly to the edges. This is your filling layer, so don’t be stingy.
Place the second layer on top, flat side down. Press gently to set it.
Step 4: Apply the Crumb Coat
This step is why professionally decorated cakes look clean. A crumb coat is a thin layer of frosting that traps all the loose crumbs against the cake so your final coat stays crumb-free.
Spread a thin layer of frosting all over the cake — top and sides. Don’t worry about perfection here. Refrigerate for 20–30 minutes until it sets.
Step 5: Decorate Your Baby Shower Cake
Now the fun part.
For a smooth finish: Apply a generous second coat of frosting and use a bench scraper to smooth the sides while spinning the turntable. Take your time with this.
For a rustic or textured look: Use the back of a spoon or an offset spatula to create swirls and swoops. Less precise, more charming.
Piping ideas for baby shower cake decorations:
- Rosettes along the top edge
- Dots or pearls along the bottom border
- Star tips for texture on the sides
- Ruffles using a petal tip
Baby shower cake toppers are one of the easiest ways to elevate a simple cake. You can buy them online or make them yourself from cardstock. Stars, “It’s a Baby,” little onesies, animals — whatever fits your theme.
For a teddy bear baby shower cake look, you can sculpt small fondant bears and place them on the top tier. For an elephant baby shower cake, a fondant or paper topper works perfectly.
Step 6: Writing on the Baby Shower Cake
If you’re piping the message yourself, practice on a piece of parchment first. Use a #2 or #3 round tip for clean lettering.
What to write on a baby shower cake — some ideas:
- “Hello Baby”
- “Welcome, Little One”
- “Baby Loading…”
- “Tiny Hands, Big Love”
- “Oh Baby!”
- “Mommy’s Little One”
- “Sweeter Things Are Coming”
Keep it short. One line reads better than a paragraph on a cake.
Tips to Make It Actually Look Good
A few things that separate a decent cake from a great one:
Use room temperature ingredients. Cold butter and eggs don’t mix properly. It affects both texture and structure.
Chill between steps. The crumb coat, after stacking, after piping — refrigerating for even 20 minutes makes the next step easier.
Sift your powdered sugar. Lumpy buttercream is avoidable.
Don’t rush the cooling. Frosting a warm cake is a guaranteed mess.
Invest in a turntable. It’s not expensive and it changes everything about how smoothly you can decorate.
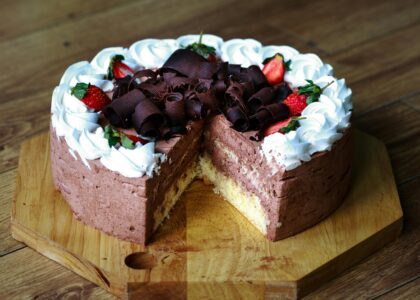
Chocolate Baby Shower Cake Option
If you want to go the chocolate route, swap ½ cup of flour for ½ cup of unsweetened cocoa powder and add ¾ cup of hot water to the batter (reduce milk accordingly). Use a chocolate ganache between the layers instead of buttercream — it tastes incredible and holds up well.
Chocolate on the inside with a light-colored buttercream on the outside is a popular combination and looks stunning when you cut into it at the shower.
What About Mini Cakes?
Mini cakes for baby showers are a great alternative to one large cake — especially if you’re serving a mixed crowd with different preferences. Use a muffin tin or mini cake rings, bake the same batter, and frost each one individually. They look adorable arranged together on a tiered stand.
Final Thoughts
Making a baby shower cake at home gives you control over flavor, design, and size — and it means something more when someone finds out you made it yourself. You don’t need to be a professional baker. You need a solid recipe, the right tools, and a willingness to take it one step at a time.
Start simple. Nail the basics. Then get creative.
To Order Cakes and for Design Idea Visit us on Instagram: @ankcake_land
Frequently Asked Questions
What size cake do I need for a baby shower?
A single 8-inch two-layer cake serves 12–16 people. For larger gatherings, go with a 10-inch or add a second tier.
How far in advance can I make a baby shower cake?
You can bake the layers 2 days ahead and wrap them tightly in plastic. Frost and decorate the day before or the morning of the event.
Can I make a baby shower cake without fondant?
Absolutely. Buttercream and fresh cream cakes look beautiful and taste better. Fondant is purely for sculpted details — it’s not required.
How do I keep the cake moist?
Don’t overbake. Brush the layers lightly with simple syrup (equal parts sugar and water, boiled) before frosting. It keeps the crumb soft for days.